
Table of Contents
Table of Contents
A Cozy, Foolproof Baked Japanese Sweet Potato Recipe (Straight From My Weeknight Oven)
Some nights, I’m not looking to “cook” so much as I’m looking to make my kitchen smell like I’ve got my life together.
That’s where baked Japanese sweet potatoes come in.
The oven hums along, the air turns cozy and spicy-sweet (I always swear I catch little hints of ginger and cinnamon in there, even when I don’t add a thing), and my cat, Miso, starts doing slow circles like she’s on quality control duty. Meanwhile, I’m barely doing anything. Just washing a few potatoes, popping them in a cold oven, and letting time handle the rest.
Here’s what you can expect from this recipe:
- A hands-off method that’s easy on weeknights.
- A naturally sweet, creamy center that honestly tastes like dessert even when you don’t dress it up.
- Texture choices: crispier skin or steamy-tender skin, depending on foil.
- Clear timing guidance by size, plus a doneness test that’s better than the clock.
- Simple serving ideas so one potato can turn into a legit side dish or a healthy dinner side.
And yes, we’re doing the cold-oven method, plus a long rest in the oven (the real secret).
For exact amounts and measurements, see the recipe card below.

What Makes Japanese Sweet Potatoes Different (And Why Baking Brings Out the Magic)
Japanese sweet potatoes aren’t the same as the soft, orange-fleshed sweet potatoes a lot of us grew up with. They’re usually:
- Denser when raw (they feel heavier for their size).
- Sweeter in a chestnut-like way, not candy-like.
- Extra creamy when baked slowly, with a texture that can go from fluffy to almost custardy.
Interestingly enough, these unique characteristics of Japanese sweet potatoes make them perfect for various recipes beyond just baking. If you're interested in exploring more about this versatile ingredient, you might want to check out this Japanese Mounjaro recipe, which showcases another delicious way to enjoy these sweet potatoes.
Common varieties you’ll see
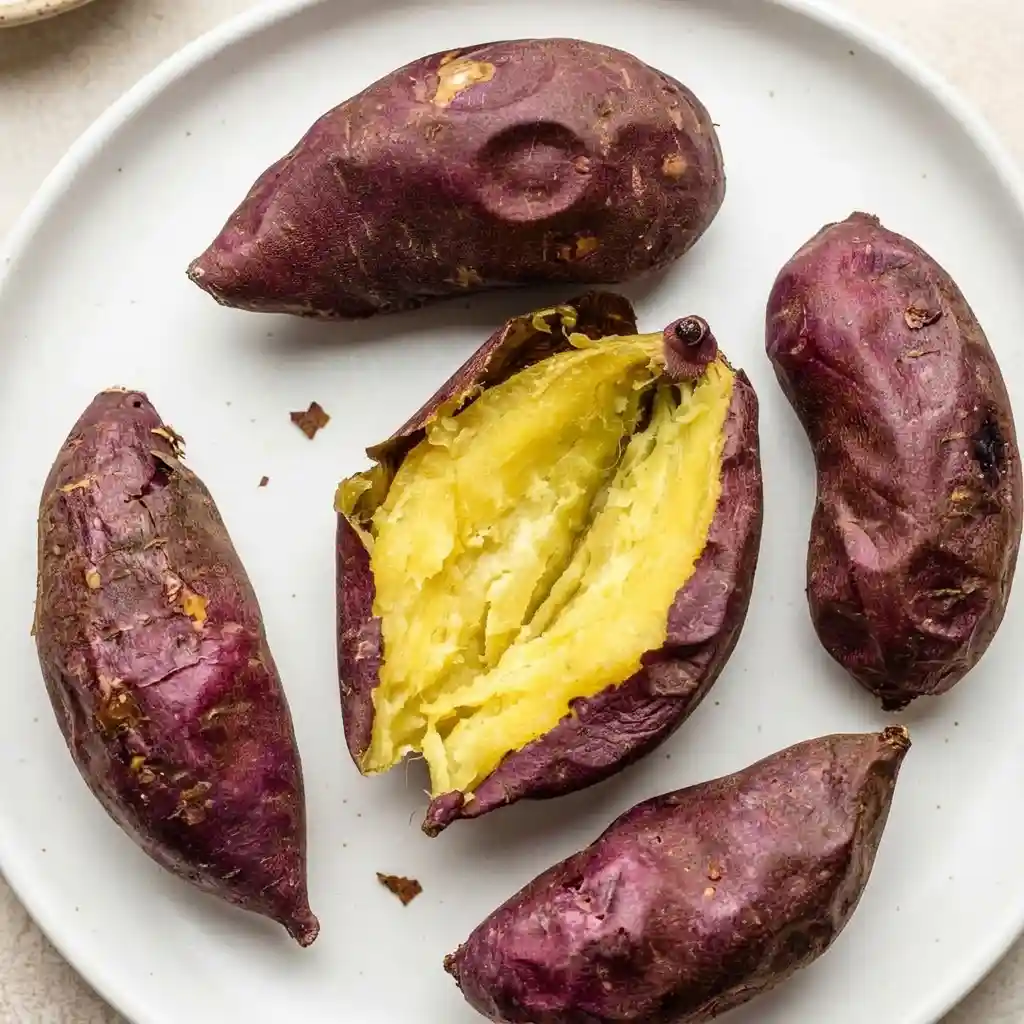
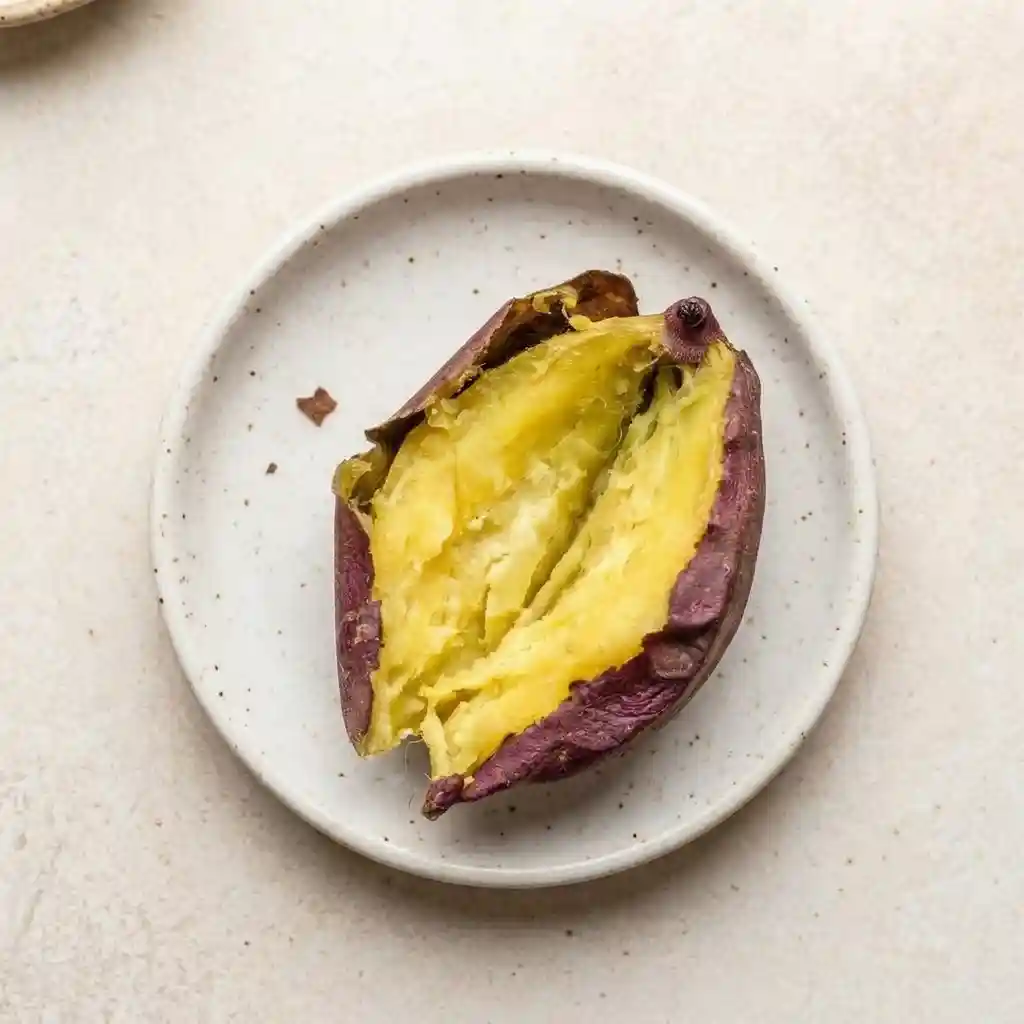
- Satsumaimo: Often what people mean by “Japanese sweet potato.” Typically purple-ish skin with pale yellow flesh. When baked, it can turn rich golden and super sweet.
- Murasaki: Also purple skin, usually whiter or cream-colored flesh. Still sweet and creamy, sometimes a touch drier than satsumaimo.
Either way, set your expectations like this: these are sweet enough to eat plain. But they’re also amazing with savory toppings because that natural sweetness plays really well with salty, umami flavors.
Why baking works so well
Baking is dry heat plus time. And when you give Japanese sweet potatoes enough time in the oven, their starches break down and the natural sugars deepen. That’s where the “magic” happens: caramelized sweetness, a creamy interior, and that slightly roasted, nutty vibe that makes you want to take bites straight from the skin.
Ingredients (You Only Need One)
This is the ultimate low-maintenance ingredient list.
You’ll need Japanese sweet potatoes (the recipe card below has the exact number and size range).
Shopping tips (so they bake evenly)
- Look for potatoes that are firm with smooth-ish skin.
- Avoid deep cracks, soft spots, or shriveled ends.
- Try to pick similar sizes so they finish around the same time.
Optional pantry add-ons (for serving later)
Not required, just fun ideas: flaky salt, butter, miso, sesame, scallions, chili crisp.
How to Bake Japanese Sweet Potatoes (Cold-Oven Method)
The cold-oven method is exactly what it sounds like: you put the potatoes in the oven before it’s hot.
Why no preheat?
Starting cold gives the potatoes a gentler ramp-up. That slow climb in temperature helps them cook through evenly and encourages a creamy, sweet center without drying out the edges too fast. It’s a very forgiving way to bake them, especially if your potatoes are on the larger side.
Method overview (what you’ll do)
You’ll:
- Wash and dry the potatoes.
- Pierce them.
- Choose foil or unwrapped.
- Bake in a cold oven at your chosen temperature.
- Test doneness with a chopstick or skewer.
- Turn the oven off and let them rest inside, door closed, for about an hour.
- Split, fluff, and serve.
A couple quick notes that make a difference:
- Wash and dry well. Scrub off any dirt, then dry thoroughly. Dry skin tends to bake up better, especially if you’re going unwrapped.
- Doneness beats the clock. The listed times are a guide, but the skewer test is the truth.
- That long oven rest is not optional in spirit. It’s where the sweetness really rounds out and the texture turns plush.
Baking Options: Low-and-Slow vs Higher Heat (Which One to Choose)
The recipe gives you two great paths, and neither one is “wrong.” It just depends on what you want tonight.
Low-and-slow
- 325°F (300°F convection), 70–90 minutes
- Best for that ultra-creamy, dessert-sweet interior.
- Perfect when you can let the oven do its thing while you handle the rest of life.
Higher heat
- 375°F (350°F convection), 50–65 minutes
- Faster, still creamy.
- Slightly firmer center with more roasted notes.
Rule of thumb by size
- Smaller potatoes (closer to 250 g) usually land near the low end of the time range.
- Larger potatoes (closer to 350 g) often need the high end, and sometimes a little more.
If you remember one thing: use the skewer test, not the clock.
If your potatoes are mixed sizes
Start the big ones first. Add the smaller ones about 10–15 minutes later so you’re not pulling them out in waves.
Foil vs Unwrapped: Texture Guide
This is where you get to choose your own baked sweet potato adventure.
Unwrapped
- Skin gets lightly crisp and a bit drier.
- Flesh can taste more concentrated and roasted.
- Great if you like eating the skin (or at least want it pleasant, not wet).
Foil-wrapped
- Skin turns very tender with more of a steamed effect.
- Great if you mostly scoop out the flesh or plan to mash it.
Not sure which you’ll like?
Bake them unwrapped, and if the skins start feeling too firm, you can tent loosely with foil toward the end. That softens things up without fully steaming the whole potato from the start.
If you’re an eat-the-skin person, you’ll probably prefer unwrapped. If you’re a scoop-the-flesh person, foil can be your best friend.
How to Know They’re Done (Without Guessing)
Here’s the simplest way to avoid cutting one open too early and finding that chalky center.
The primary test (my forever favorite)
A chopstick or skewer should slide through the center with almost no resistance. You want it to feel like you’re gliding through softened butter, not pushing through a raw potato core.
Helpful secondary cues
- You might see a little syrupy caramelization near the ends.
- The potato should feel heavy but soft if you gently squeeze it with an oven mitt.
Signs they’re underbaked
- Resistance in the center with the skewer.
- Flesh looks pale and tastes starchy.
- Texture is crumbly or chalky instead of creamy.
If that happens, just keep baking and re-test. No drama.
Signs they’re overbaked
- The potato looks very collapsed.
- Edges seem dry.
Still totally edible. If they’re a little dry, they’re honestly great mashed with butter (or turned into a quick mash-style side).
Don’t forget the rest
The 1-hour oven rest is part of the doneness story. If the skewer test says “almost,” that rest often takes it from “pretty good” to “why is this so sweet?”
Serving Ideas: Turn One Baked Japanese Sweet Potato Into a Full Side Dish
I love these because they’re mix-and-match. You can keep it simple, or you can make it feel like a whole moment without doing much extra.
Classic & Simple (The Way I Eat It While Cleaning Up the Kitchen)
This is my go-to when I’m tidying the counters and trying to eat something warm before I start thinking about dessert.
- Split the potato.
- Fluff the inside with a fork.
- Add a pinch of flaky salt.
- Add a small pat of butter if you want that extra comfort.
If you want a cozy vibe, a little cinnamon works beautifully without turning it into a sugar bomb.
Pair it with:
- Grilled fish
- Teriyaki chicken
- A simple tofu bowl
- Miso soup (especially on chilly or rainy nights)
Savory Japanese-Inspired Toppings (My Go-To Weeknight Upgrades)
These are the toppings that make the sweet potato feel like it belongs next to whatever else you’re cooking.
Miso butter
- Mix softened butter with white miso, then let it melt over the hot potato.
- Sweet + salty + savory is always the move here.
Sesame-scallion
- A little sesame oil, toasted sesame seeds, sliced scallions, and just a tiny drop of soy sauce.
- Keep it light so the potato’s sweetness still shines.
Nori & mayo
- Torn nori, a drizzle of Kewpie-style mayo, and (if you like heat) a sprinkle of shichimi togarashi.
Soy-ginger drizzle
- Soy sauce, grated ginger, and a touch of rice vinegar.
- Think of it as a bright, salty contrast, not a heavy sauce.
Make It a Healthy Dinner Side: 3 Easy Plate Pairings
If you ever feel stuck at dinner, this formula helps: protein + veggie + sweet potato.
A few easy plates:
- Salmon + cucumber salad + baked Japanese sweet potato
- Rotisserie chicken + sautéed greens + baked Japanese sweet potato
- Pan-fried tofu + broccoli + baked Japanese sweet potato
Japanese sweet potatoes are naturally satisfying, which makes them awesome for lighter meals that don’t feel like you’re missing something. However, if you're looking for something more hearty, consider trying a ground turkey sweet potato bake, or perhaps a loaded potato soup that incorporates these delicious ingredients.
Storage, Reheating, and Meal Prep (Because You’ll Want Extras)
If you’re already turning on the oven, baking a batch is such a smart move.
Storage
Let them cool fully, then refrigerate in an airtight container for 3–5 days. I like keeping the skins on because it helps retain moisture.
Reheating (best texture)
- Oven or toaster oven: Reheat around 350°F until hot. This keeps the texture closer to freshly baked.
Microwave method (fastest)
Microwaving works when you’re in a hurry. To reduce drying, cover with a damp paper towel and heat until warmed through.
Meal prep tip
Bake a batch, do the full oven rest, chill them, and you’ve got easy sides for bowls, quick dinners, or a mash-style situation any night you don’t feel like starting from scratch.
Freezing note
You can freeze them, but the texture tends to soften after thawing. If you go that route, they’re usually best mashed or blended into something like soup.
Troubleshooting: Fix the Most Common Baked Sweet Potato Problems
Too firm in the center
- Keep baking and re-test with a skewer.
- This is usually a size issue (one potato is bigger than the rest).
- Next time, consider the low-and-slow option if you want a more forgiving bake.
Not sweet enough
- Usually underbaked or the rest was skipped.
- That 1-hour oven rest really helps the sweetness develop and the texture settle.
Skin too tough
- Try foil next time, or tent with foil near the end.
- If you already baked them unwrapped and the skin feels too firm, you can scoop the flesh and call it a win.
Watery or bland
- Potatoes may be older or have been stored too long before you bought them.
- Choose firmer potatoes next time.
- Baking unwrapped helps concentrate flavor.
Burning syrup on the tray
- Line your tray with parchment or foil, or place a tray on the rack below to catch drips.
A Quick Note on Murasaki: How This Recipe Works for Purple-Skinned Japanese Sweet Potatoes
Murasaki sweet potatoes are often labeled simply “Japanese sweet potato,” and this method works beautifully for them.
A couple expectations:
- They bake up sweet and creamy, though sometimes a little drier than other varieties.
- If you want softer skin and a more steamed vibe, foil can help.
Timing-wise, follow the weight-based guidance and trust the skewer test.
If you want one topping that really clicks with murasaki, I’d pick miso butter or sesame-scallion. Both bring savory depth without drowning out that gentle sweetness.
Wrap-Up: The Easiest Japanese Side Dish You’ll Make All Week
This is the whole method in a nutshell:
- Start in a cold oven.
- Choose your temperature based on time and texture.
- Use the skewer test, not the clock.
- Let them do that long, quiet rest in the oven.
It works because gentle heat plus time lets the inside turn creamy and caramel-sweet, with almost no effort from you.
Bake a batch, stash them in the fridge, and let future-you win dinner a few nights in a row.
Recipe Card: Baked Japanese Sweet Potato Recipe
Ingredients
- 5 Japanese sweet potatoes, approximately 250–350 g each
Instructions
- Prepare the Japanese sweet potatoes. Wash thoroughly and pat dry. Pierce each potato a few times with a fork. Wrap individually in aluminum foil or leave unwrapped, depending on your preferred texture.
- Bake without preheating. Place the sweet potatoes on a baking tray or directly on the oven rack in a cold oven. For a lower temperature, bake at 325°F (300°F convection) for 70–90 minutes. For a higher temperature, bake at 375°F (350°F convection) for 50–65 minutes.
- Check for doneness. The baked Japanese sweet potatoes are ready when a chopstick or skewer slides easily through the center. Baking time will vary depending on their size.
- Rest in the oven. Turn off the heat and leave the sweet potatoes inside with the door closed for about 1 hour, allowing them to cool gradually. Serve and enjoy!
FAQs
What makes Japanese sweet potatoes different from regular sweet potatoes?
Japanese sweet potatoes are denser, sweeter in a chestnut-like way, and become extra creamy when baked slowly. Unlike the soft, orange-fleshed sweet potatoes many are familiar with, Japanese varieties offer a naturally sweet, creamy center that tastes almost like dessert even without toppings.
Why is the cold-oven method recommended for baking Japanese sweet potatoes?
The cold-oven method involves placing the potatoes in an oven before it heats up, allowing a gentle temperature ramp-up. This slow climb ensures even cooking, encourages a creamy and sweet center, and prevents the edges from drying out too quickly. It's especially forgiving for larger potatoes.
How do I test if my baked Japanese sweet potato is done?
Instead of relying solely on baking times, use a chopstick or skewer to test doneness. Insert it into the potato; if it slides in easily without resistance, the potato is cooked through. This method ensures perfect texture every time.
Can I choose between crispier skin or tender skin when baking these sweet potatoes?
Yes! You can achieve different textures based on whether you wrap the potatoes in foil or leave them unwrapped. Foil-wrapped potatoes tend to have steamy-tender skin, while unwrapped ones develop a crispier exterior.
What are some simple serving ideas for baked Japanese sweet potatoes?
Baked Japanese sweet potatoes can be enjoyed plain due to their natural sweetness or dressed up with pantry add-ons like flaky salt, butter, miso, sesame seeds, scallions, or chili crisp. These toppings complement their umami flavors and transform one potato into a delicious side dish or healthy dinner option.
How should I select Japanese sweet potatoes for even baking?
Choose firm Japanese sweet potatoes with smooth-ish skin, avoiding any with deep cracks, soft spots, or shriveled ends. Selecting potatoes of similar size ensures they bake evenly and finish around the same time.
Baked Japanese Sweet Potato
Ingredients
Method
- Wash and pat dry the Japanese sweet potatoes.
- Pierce each potato a few times with a fork.
- Wrap individually in aluminum foil or leave unwrapped, depending on your preferred texture.
- Place the sweet potatoes on a baking tray or directly on the oven rack in a cold oven.
- For a lower temperature, bake at 325°F (300°F convection) for 70–90 minutes.
- For a higher temperature, bake at 375°F (350°F convection) for 50–65 minutes.
- Check for doneness using a chopstick or skewer; it should slide easily through the center.
- Turn off the heat and leave the sweet potatoes inside the oven with the door closed for about 1 hour to cool gradually.
- Serve and enjoy!