
Table of Contents
Table of Contents
A cozy, weeknight-ready stuffed bell peppers recipe (from my Austin kitchen)
This stuffed bell peppers recipe is one of those dinners that feels like you really did something, even when it’s just a normal Tuesday night. In my Austin kitchen, it usually starts with that familiar sizzle in the skillet, the onion turning glossy, garlic getting fragrant, and a warm, tomatoey smell that makes the whole place feel instantly cozier. And yes, my curious cat Miso is usually weaving by my ankles like he’s on the cooking show payroll.
Here’s what you can expect: classic stuffed bell peppers with ground beef, rice, tomatoes, and melty cheese. It’s straightforward enough for a weeknight dinner, solid for a family dinner, and dependable for meal prep dinner plans when you want something that reheats like a champ.
I’m keeping this simple on purpose: familiar ingredients, clear cues so you know what you’re looking for at each stage, and easy swaps if you want to nudge it into the “healthier dinner ideas” zone. For exact amounts and measurements, see the recipe card below.
Why stuffed bell peppers are the ultimate healthy dinner idea
Stuffed peppers are basically the “complete meal” of the dinner world. You’ve got:
- Protein from the beef
- Carbs from the rice
- Veggies from the peppers (and tomatoes in the filling)
And it all bakes up in a neat little package that’s naturally portion-friendly. That’s a big reason stuffed peppers land on so many dinner ideas healthy lists. You can keep the comfort, but still feel like you’re eating something balanced.
They’re also practical in the best way:
- Minimal side dishes needed. They’re already a full plate.
- Make-ahead friendly. The filling can be cooked ahead (similar to how you would prepare for a chicken quesadilla), and the peppers bake when you’re ready.
- Reheat well. The flavors usually get even better after a night in the fridge.
If you like dinners that make you feel taken care of without creating a sink full of chaos, this one’s for you.

Ingredients you’ll need (and what each one does)
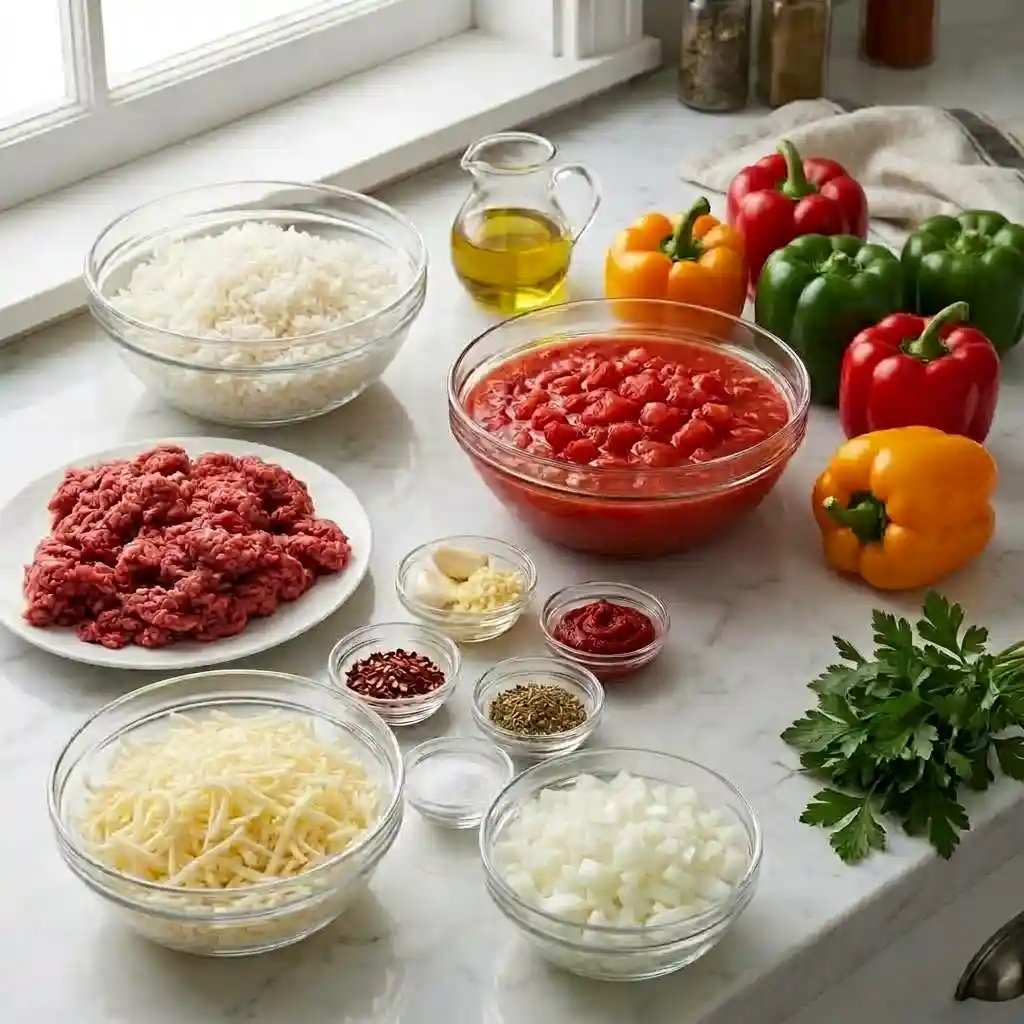
This recipe is built around a few pantry staples that do a lot of heavy lifting. I’m grouping them so it’s easy to scan, and I’ll explain what each part contributes. For exact amounts and measurements, see the recipe card below.
Aromatics (the flavor foundation)
- Extra-virgin olive oil: Helps the onion soften and carries flavor through the whole filling.
- Yellow onion: Adds sweetness and that savory, cozy base that makes the filling taste “cooked all day,” even when it hasn’t.
- Garlic: Brings that instant warmth and aroma. You’ll smell it and immediately know you’re on the right track.
Filling (hearty, saucy, scoopable)
- Tomato paste: Concentrated tomato flavor. When it cooks for a minute, it gets darker and smells almost a little toasty. That’s depth.
- Ground beef: The hearty backbone of the filling.
- Cooked rice (white or brown): Gives structure so the filling isn’t loose. It also stretches the beef in a very weeknight-friendly way.
- Diced tomatoes: Adds moisture and a little tang, creating that saucy texture that bakes up beautifully.
- Dried oregano: Classic Italian-style vibe that works really well with tomatoes and beef.
- Kosher salt + freshly ground black pepper: Makes everything taste like itself, only better.
The peppers (the “edible baking dish”)
- Bell peppers (tops and cores removed): They soften in the oven and turn sweet and tender, holding all that savory filling.
Topping + finish (the comfort factor)
- Shredded Monterey Jack: Melts smoothly and browns nicely at the end.
- Chopped fresh parsley (for serving): Wakes everything up at the finish, especially if your filling is rich and cheesy.
How to make stuffed peppers (step-by-step)
The recipe card below is the official roadmap, but I’m going to walk you through what each stage should look like and smell like. Think of this as your “you’re doing great” guide.
Step 1: Build the flavor base (onion, garlic, tomato paste)
Start by getting your oven heating so it’s ready when you are. Then you’ll warm oil in a skillet and cook the onion until it softens.
What you’re looking for here is onion that’s tender and translucent, not browned and crispy. It should smell sweet and mellow, and the pieces should look a little glossy as they cook in the oil.
Then in goes the garlic and tomato paste. This part is quick, but it matters. Stir constantly and pay attention to the smell. When tomato paste “blooms” in the pan, it goes from raw and sharp to deeper and almost savory-sweet. If you’ve ever smelled the difference between opening a can of tomato paste and smelling it after it’s cooked for a minute, you know exactly what I mean. That toasty moment is your signal you’re on track.
Quick tip that saves flavor: don’t let the garlic hang out too long on its own. Once it’s fragrant, you’re ready for the beef.
Step 2: Brown the ground beef (without drying it out)
Add the ground beef and break it up with a wooden spoon as it cooks. You’re aiming for beef that’s no longer pink, but still juicy. Stir and break it up into small pieces so the filling feels cohesive when you scoop it into the peppers.
Seasoning-wise, I like to think of this as “season in layers.” Add some salt and pepper now, then taste again later once the tomatoes and rice are in the mix. Tomatoes can shift the balance, and rice can mellow seasoning, so you’ll fine-tune after.
If you notice a lot of fat pooling, you can spoon a bit off, but you don’t have to get obsessive about it. A little fat carries flavor, and this is comfort food.
Step 3: Add rice + tomatoes, then simmer to the perfect filling texture
Once the beef is cooked, stir in the cooked rice and diced tomatoes. Then you’ll season with oregano, salt, and pepper, and let it simmer for a few minutes.
This simmer is where the filling stops feeling like “skillet dinner” and starts feeling like “stuffed pepper filling.” The goal is a mixture that’s:
- Scoopable
- Moist but not soupy
- Thick enough to mound on a spoon without running
If it’s too wet when you stuff the peppers, it can bake up watery in the dish. Letting it reduce just slightly helps the peppers turn out hearty instead of puddly.
A good beginner cue: when you drag your spoon across the pan, you should briefly see the bottom of the skillet before the mixture settles back in.
Step 4: Prep the bell peppers for stuffing (clean cuts, stable fit)
For the peppers, you’ll remove the tops and cores so they’re ready to fill. Try to keep your cuts fairly clean so the peppers stand up well and hold the filling without tearing.
Set the peppers cut-side up in a 13″ x 9″ baking dish. You want them snug so they don’t wobble and tip while baking. If one pepper is determined to lean like it’s lounging at the pool, you can rearrange the dish until it behaves.
A simple tip for even cooking: choose peppers that are roughly similar in size. That way, they all hit “tender” around the same time.
Then drizzle the peppers with a little oil. It helps the edges soften nicely and keeps them from drying out in the oven.
Step 5: Stuff, cover, bake—then finish with bubbly cheese
Spoon the filling into the peppers, bringing it all the way to the top. I like to gently press down as I go, just enough to remove air gaps so each pepper feels nicely packed. You don’t want to crush the pepper, just snug the filling in.
Then the peppers bake covered at first. Covering with foil is the trick for tenderness because it traps steam, helping the peppers soften without the tops drying out.
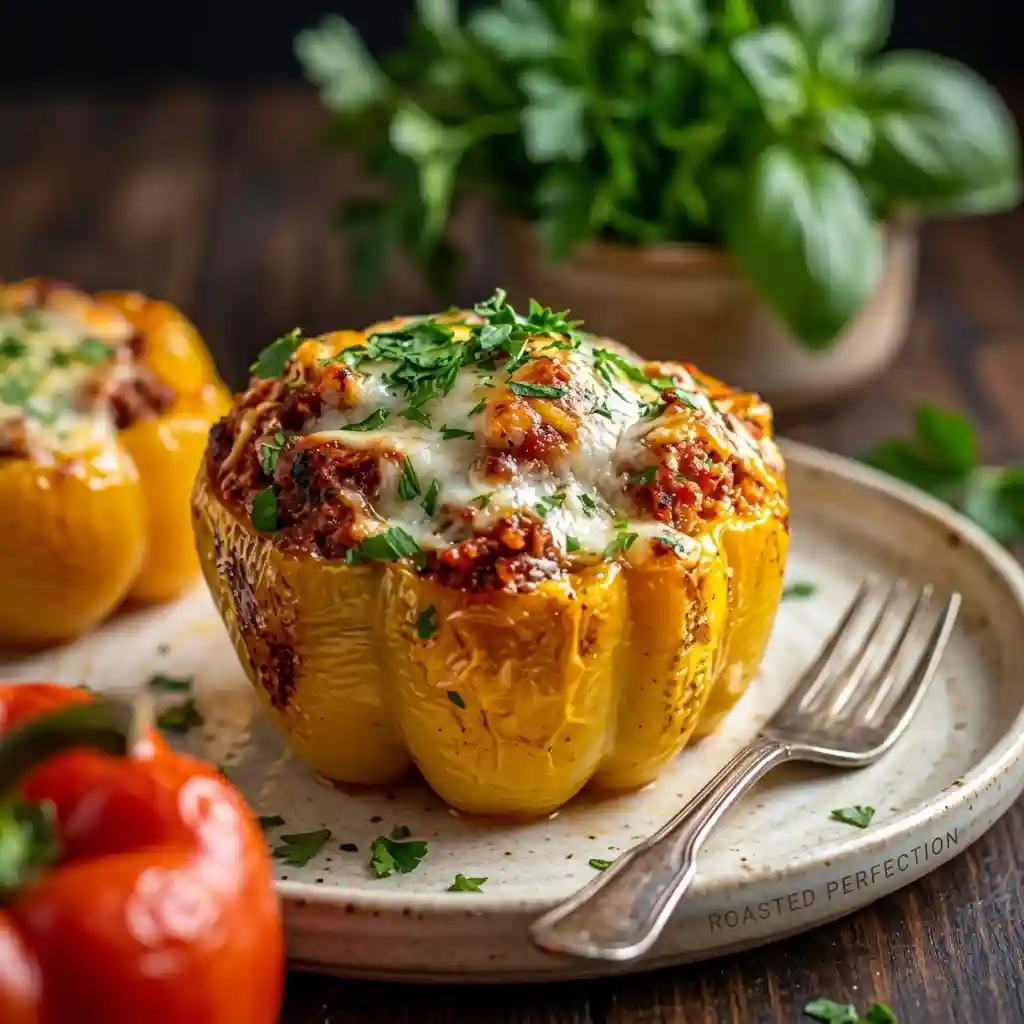
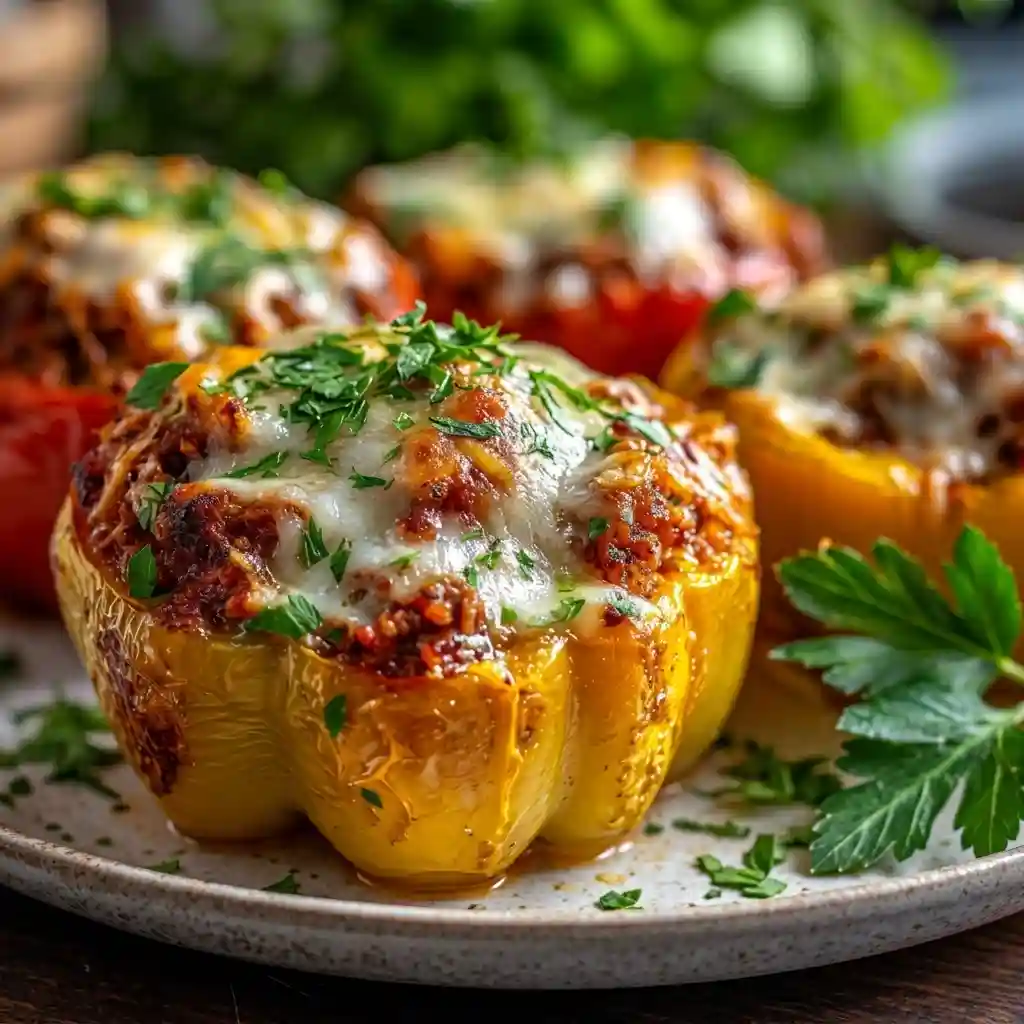
Once the peppers are tender, you’ll uncover them, sprinkle with Monterey Jack, and bake again until the cheese is melted and bubbly.
Finish with chopped parsley right before serving. It’s a small step that makes the whole dish feel brighter and a little more special, especially if you’re doing this as a family dinner.
Tips for the best stuffed bell peppers (the little things that change everything)
A few small details can take stuffed peppers from “pretty good” to “why didn’t I make these sooner?”
Choose your pepper color on purpose
- Red, yellow, and orange peppers tend to be sweeter and softer once baked.
- Green peppers have more bite and a slightly more bitter edge (in a good way, if you like that).
If you’re cooking for a mixed crowd, sweeter peppers are usually the safest bet.
Keep the filling from turning watery
Two things help here:
- Simmer the filling until it reduces slightly before stuffing.
- Cover the peppers for the first part of baking so they steam and soften evenly.
Add the cheese at the end
Putting cheese on too early can make it melt down into the filling and disappear. Adding it near the end gives you that bubbly, browned top that feels like the whole point.
Taste the filling before you stuff
This is the moment to adjust salt, pepper, and oregano. The pepper itself is mild and a little sweet, so the filling should taste just slightly more seasoned than you think it needs. Once it’s inside the pepper, it’ll mellow out.
Easy ways to make this stuffed peppers recipe healthier (without losing comfort)
I’m a big believer in “small swaps, same cozy payoff.” You don’t have to turn dinner into a project to make it feel a little lighter.
Go leaner with the beef
Using leaner ground beef is the simplest move. If there’s still excess fat after browning, you can remove some. You’ll keep the beefy flavor, just with a lighter feel.
Choose brown rice for a whole-grain boost
Brown rice brings a slightly nutty flavor and a heartier texture. It also leans into that dinner ideas healthy vibe without changing the spirit of the dish.
Adjust the cheese, don’t eliminate the joy
If you want to lighten things up, you can use a bit less cheese. You’ll still get that melty top, especially if you spread it evenly. And keep the parsley. That fresh finish helps the whole dish taste brighter.
Add more vegetables (optional, but easy)
If you want to bulk up the filling with extra veggies, a few good options are:
- chopped mushrooms
- chopped zucchini
- a handful of spinach
If you’re adding high-moisture veggies (like zucchini or mushrooms), it’s smart to sauté them first so they don’t water down the filling. This is optional, but it helps keep the texture thick and scoopable.
Make-ahead, meal prep, and storage (perfect for busy weeks)
Stuffed peppers are one of my favorite “future me will be grateful” meals.
Make-ahead approach
You can cook the filling in advance, then store it and stuff the peppers when you’re ready to bake. That way, dinner assembly feels fast, and you still get that fresh-baked pepper texture.
Meal prep dinner ideas
For meal prep, portion the peppers into containers so they’re grab-and-go. If you like the parsley really fresh, pack it separately and sprinkle after reheating.
If you want to add a side that reheats well, roasted vegetables or simple rice are easy companions. But honestly, these peppers are already a full plate.
Food safety note (so you’re not guessing)
For storage and reheating safety, I stick to USDA guidance. If you need a refresher on safe refrigeration timelines, freezing, and reheating basics, the USDA has a clear overview here: https://www.fsis.usda.gov/food-safety/safe-food-handling-and-preparation/food-safety-basics/leftovers-and-food-safety
Freezer notes (for future-you dinners)
If you’re thinking about freezing, you’ve got two practical options:
- Option A: Freeze baked stuffed peppers. Let them cool completely first, then wrap and freeze.
- Option B: Freeze the filling separately. This is great if you want faster assembly later. Thaw, stuff fresh peppers, and bake.
Either way, label with the date and a quick note to yourself about what it is. (Because freezer mysteries are real.)
One honest texture expectation: peppers will usually soften more after freezing and thawing. They’re still really tasty, just a little less “fresh-baked firm” and a little more tender.
What to serve with stuffed bell peppers (simple, healthy sides)
Stuffed peppers don’t need much, but a simple side can make dinner feel more complete, especially if you’re serving a group.
Keep it light and fresh
A cucumber-tomato salad is perfect here. It’s crisp, bright, and makes the whole plate feel vibrant. (This is where my Austin kitchen prep rhythm kicks in, slicing cucumbers beside tomatoes and greens and feeling like I’m doing something nice for myself.)
Quick greens
- Roasted broccoli
- Sautéed spinach
- Mixed greens with lemon and olive oil
These take almost no mental effort and pair well with the savory filling.
Family dinner additions
If you want something a little more cozy or kid-friendly:
- Garlic bread
- Simple corn
If you’re tracking macros or portions
Serve them as-is. They’re already built like a balanced meal.
A final note from my kitchen: the “welcome home” dinner you’ll repeat
Cooking has always been my comfort zone. I’m Becky Masson, a home cook in Austin, Texas, and I share my kitchen with my curious cat, Miso. I first fell in love with the warm, welcoming feeling of my grandmother’s kitchen, and later, during university, cooking became my therapy and creative outlet. These days, I’m still learning through classes, experimenting with seasonal ingredients, and chasing that mix of comfort and playfulness that makes a meal feel like home.
That’s why I love recipes like this. Stuffed peppers are a repeatable base that you can make once as written, then riff on forever, more veggies one week, brown rice the next, a little less cheese when you want it lighter. And when it succeeds and brings some joy to the table, that’s success in my book.
Make it once, get the rhythm down, and then let it fit your weeknight life. For exact amounts and measurements, see the recipe card below.
FAQs
What makes stuffed bell peppers a healthy and complete meal?
Stuffed bell peppers combine protein from ground beef, carbs from rice, and veggies from the peppers and tomatoes, creating a balanced, portion-friendly meal that requires minimal side dishes.
Can I prepare the stuffed bell peppers recipe ahead of time?
Yes! The filling can be cooked in advance, and you can bake the peppers when you're ready. This make-ahead approach is practical for busy weeknights and meal prep plans.
What are the key ingredients needed for this stuffed bell peppers recipe?
You'll need extra-virgin olive oil, yellow onion, garlic, tomato paste, ground beef, cooked rice (white or brown), diced tomatoes, dried oregano, kosher salt, freshly ground black pepper, bell peppers (tops and cores removed), shredded Monterey Jack cheese, and chopped fresh parsley for serving.
How do I know when the flavor base of onion, garlic, and tomato paste is ready?
Cook the onion until it's tender, translucent, and glossy but not browned. Add garlic and tomato paste next; stir constantly until the tomato paste blooms—its aroma changes from raw to a deeper, savory-sweet scent indicating it's perfectly cooked.
What type of cheese works best as a topping for stuffed bell peppers?
Shredded Monterey Jack cheese is ideal because it melts smoothly and browns nicely at the end of baking, adding a comforting finish to the dish.
Why are stuffed bell peppers ideal for weeknight dinners?
This recipe is straightforward with familiar ingredients and clear steps. It reheats well for leftovers, requires minimal cleanup since it's a full meal in one dish, and offers comforting flavors that make any Tuesday night feel special.
Stuffed Bell Peppers Recipe
Ingredients
Method
- Preheat oven to 400°F (200°C).
- In a large skillet over medium heat, heat olive oil. Cook onion for about 7 minutes until softened.
- Stir in garlic and tomato paste, cooking for an additional minute until fragrant.
- Add ground beef and cook until no longer pink, about 6 minutes.
- Stir in cooked rice and diced tomatoes; season with oregano, salt, and pepper. Let simmer for about 5 minutes.
- Arrange peppers cut side up in a baking dish and drizzle with oil.
- Spoon the beef mixture into each pepper and cover with foil.
- Bake for 35 minutes, uncover, sprinkle with cheese, and bake for an additional 10 minutes until cheese is bubbly.
- Top with chopped parsley before serving.