Table of Contents
Table of Contents
Flaky crust, warm spiced apples
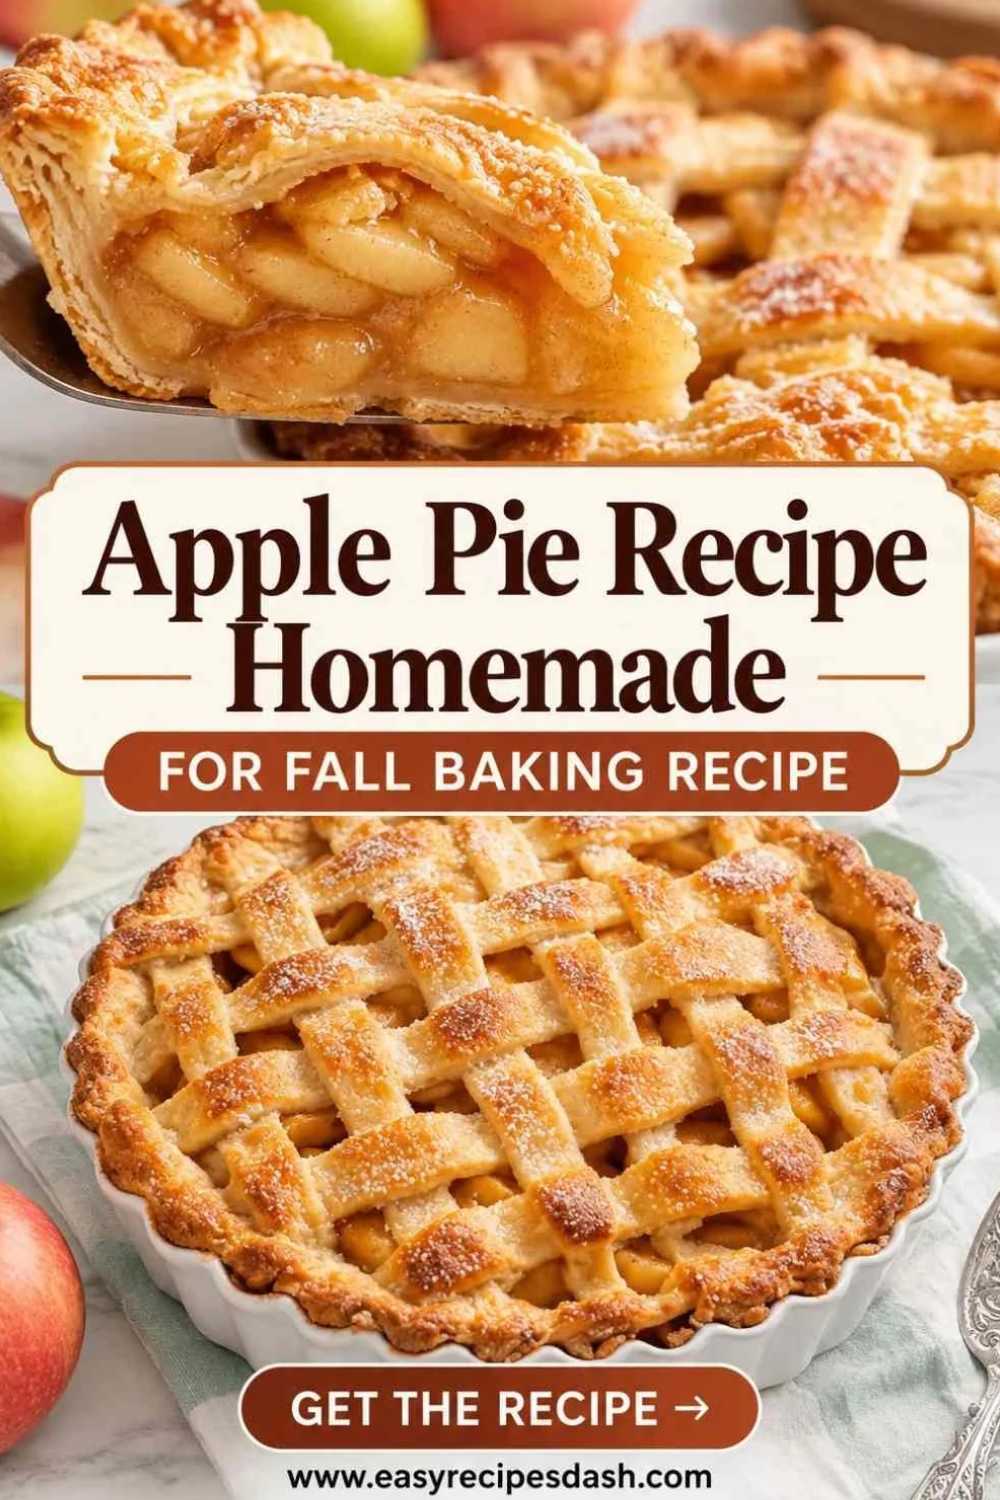
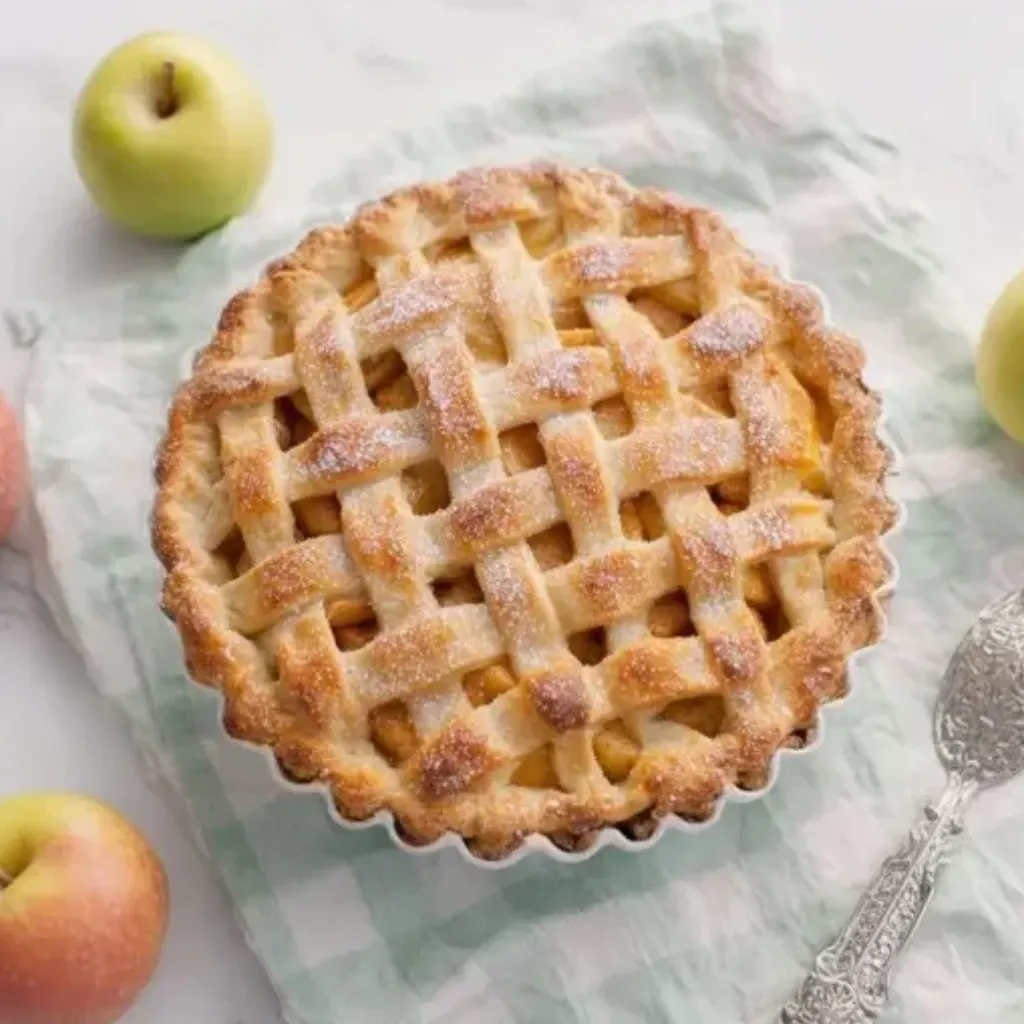
If you’re looking for an apple pie recipe homemade bakers can trust, this is the real deal: a true-from-scratch, classic double-crust apple pie with a buttery, flaky shell and warm, cinnamon-nutmeg apples bubbling right up through the vents.
It’s the kind of pie that makes your kitchen smell like pure comfort. Think golden crust with crisp edges, a little sparkle of sugar on top, and that cozy cloud of spice-steam when you crack the oven door. It’s very “Pinterest dessert goals,” especially once those juices start bubbling at the edges on a baking sheet.
And yes, it takes a little time, but it’s the smart kind of time. You’ll chill the dough while you slice apples, and the steps stay simple. You just need a couple of good checkpoints, and you’ll get that big homemade payoff.
What to expect: This recipe makes one 9-inch pie. Plan for prep + chilling + baking, and then don’t skip the final part: cool the pie for 2 hours so the filling sets up and you get clean, gorgeous slices.
While this apple pie is an absolute delight, it's not the only recipe that brings joy to my kitchen. For instance, there's also something special about a well-made chicken quesadilla, or a refreshing chicken salad that can equally fill your home with delicious aromas and bring comfort to your dining table.
what to expect
This is a classic double-crust apple pie Recipe Homemade made with a Granny Smith + Honeycrisp mix, which gives you that perfect balance of tart, sweet, and juicy without turning into apple soup. Speaking of apple soup, if you're ever in the mood for something different, you might want to try this loaded potato soup recipe.
Here’s what you’re aiming for:
- Crust: flaky and tender with crisp, golden layers
- Filling: warmly spiced, not-too-sweet, with a bright lemon finish
- Texture: thickened enough to slice cleanly after cooling
- Difficulty: beginner-friendly, as long as you watch the key cues (pea-size butter, cold dough, bubbling center)
Equipment you’ll want nearby: a 9-inch pie dish, rolling pin, pastry cutter (or your fingers), a baking sheet (seriously, save your oven), and foil or a pie shield for the edges.
Make-ahead help: you can make the dough up to 2 days ahead, and you can bake the pie a day early for holidays. Apple pie actually loves a little time to settle.
Why You’ll Love This Recipe
- It tastes like a bakery pie, but it’s yours. That buttery, flaky crust plus warm spiced apples is classic comfort in dessert form.
- It’s built to be reliable. Clear temperature changes, simple ingredients, and a thickener that helps you avoid the dreaded runny slice.
- It fits so many moments. Thanksgiving, Christmas, potlucks, cozy weekends, “I need a kitchen project” afternoons. It’s a centerpiece dessert without being fussy.
Ingredients you’ll need
For exact amounts and measurements, see the recipe card below.
Crust ingredients (the “why” behind them)
- All-purpose flour builds the structure, so the crust can hold that juicy filling.
- Salt keeps the crust from tasting flat and brings out the buttery flavor.
- A little sugar helps with browning and adds just a whisper of sweetness.
- Cold butter creates flakes. Those little cold butter pieces melt in the oven and leave behind layers.
- Ice water hydrates the dough just enough to bring it together without melting the butter.
Filling ingredients (how you get that sliceable set)
- A mix of apples gives you the best of both worlds: structure plus flavor.
- Sugar sweetens, but you still want the apples to taste like apples.
- Flour (as a thickener) helps the filling set instead of slumping all over the plate.
- Cinnamon + nutmeg brings that warm, familiar apple pie flavor.
- Lemon juice brightens everything and keeps the filling from tasting heavy.
- Butter adds richness and helps the juices turn into a glossy, flavorful sauce.
Finishing touches
- Milk or egg wash gives you a shiny, golden top.
- A sprinkle of sugar adds sparkle and a tiny crunch, which looks amazing in photos.
Why Granny Smith + Honeycrisp works so well
- Granny Smith: tart, firm, holds shape
- Honeycrisp: sweet, juicy, great apple flavor
Together, you get a filling that tastes layered, not one-note. This combination is perfect for various types of apple pies, whether you're making a classic apple cinnamon pie or experimenting with an apple slab pie with maple glaze.
Simple swaps: If you need gluten-free or vegan options, I’ve got you in the variations section below (with notes on what will change and what will stay the same).
How to make apple pie recipe homemade crust (from scratch)
Homemade crust sounds intimidating until you realize it’s mostly about temperature and not overthinking it.
Step 1: Mix the dry ingredients.
Whisk the flour, salt, and sugar so everything distributes evenly. You want a consistent base before butter goes in.
Step 2: Cut in cold butter.
Add cold, cubed butter and cut it in until the mixture looks like coarse crumbs with some pea-size pieces still visible. That “pebbly” look is exactly what you want. Those butter bits become flaky layers later.
Step 3: Add ice water just until it holds.
You’re not trying to make wet dough. You want it to look a little shaggy but hold together when you press it.
Step 4: Divide and chill.
Divide into two discs, wrap tightly, and chill at least 30 minutes. Chilling relaxes the dough and re-firms the butter, which helps prevent shrinking and improves flakiness.
Rolling guide (so you don’t fight the dough)
- Lightly flour your surface and rolling pin.
- Roll from the center out, rotating the dough as you go.
- Aim for about a 12-inch circle so it fits a 9-inch pie dish with a little overhang.
Easy transfer tip: roll the dough loosely around your rolling pin, then unroll it into the pie dish. Lift and settle it gently so you don’t stretch it (stretching leads to shrinking).
How to make the apple pie filling (no runny pie)
A great apple pie filling isn’t complicated, but it does need two things: even slices and a little patience.
Slice the apples evenly.
Go for thin, consistent slices so they bake at the same rate. As a general cue, think “thin enough to bend slightly, not paper-thin.” Even slicing also helps the filling set evenly.
Toss to coat.
Mix the apples with the sugar, flour, cinnamon, nutmeg, and lemon juice until everything looks evenly coated.
Rest the filling for about 10 minutes.
This step is sneakily important. The apples start releasing juices, which helps you understand how wet the filling will be before it hits the crust. It also helps the flour begin doing its thickening job more evenly.
Dot with butter before sealing.
Those little bits melt into the filling and make the juices taste richer and more rounded.
Quick taste check: If your apples taste extra tart, you can adjust slightly with a bit more sugar. If they taste super sweet, the lemon helps keep everything bright.
Assemble the pie: double crust or lattice
You can do a full top crust or a lattice. Both work beautifully here, so choose based on your mood and how much you want to show off that bubbling filling.
Bottom crust: Roll to about 12 inches, then lay it into your 9-inch pie dish without stretching. Let it fall into the corners naturally.
Add the filling: Spoon it in evenly and mound it slightly higher in the center. That classic “domed” look isn’t just pretty. It also helps the pie look full after baking.
Top crust + seal: Add your top crust (or lattice), trim the overhang, and crimp firmly. A good seal helps prevent leaks and keeps the filling where it belongs.
Finish the top: Brush with milk or egg wash, then sprinkle with sugar for that golden, crisp finish.
Bake on a sheet pan: Always. Apple pie bubbles happen, and a baking sheet catches drips so you don’t end up with burnt sugar smoke in your oven.
Bake it right: golden crust, tender apples
Apple pie loves a two-temperature bake.
Start hot: Preheat to 425°F. That early blast of heat sets the crust and encourages flaky layers.
Then reduce: After 20 minutes, reduce to 375°F so the apples cook through without burning the crust.
How to tell it’s done
- The top crust looks deep golden brown
- You see bubbling in the center vents, not just around the edges
- A knife or skewer slides into the apples with little resistance (tender, not mush)
Protect the edges if needed
If the edges brown too quickly, add foil or a pie shield partway through baking. This keeps the rim from over-browning while the center finishes.
Cooling rule (don’t skip this)
Cool the pie for at least 2 hours. This gives the filling time to thicken and set. If you slice too early, the juices will run, even if you baked it perfectly. You can always warm slices later.
Expert Tips and Tricks
- Keep everything cold. Using cold butter and chilled dough creates flakes for your pie crust. Warm butter smears and can make the crust tough.
- Don’t overwork the dough. Mix just until it holds together. Overmixing builds gluten and makes crust chewy.
- Control filling moisture. Slice evenly, rest the filling, and vent the top crust so steam can escape.
- Crimp tight. A firm seal helps keep juices inside the pie instead of spilling onto the pan.
- Let it cool before slicing. For clean slices, cooling is non-negotiable. If you want warm pie, rewarm after it sets.
- When making your pie crust, consider using an all-butter recipe for richer flavor and better texture.
Recipe Variations and Possible Substitutions
Only use these if you need them. The classic version is absolutely worth doing as written.
Vegan
- Use vegan butter in the crust and in the filling (in place of butter).
- Brush the top with plant milk instead of egg wash.
- Note: vegan butter can soften faster than dairy butter, so chilling becomes even more important.
Dairy-free
- Use plant-based butter and choose a dairy-free wash (like oat or almond milk).
- What changes: flavor stays cozy and classic, but the crust may brown a bit differently depending on the butter brand.
Spice twists (my Austin pantry moment)
- Add a pinch of cardamom or ginger for extra warmth.
- This makes the pie smell incredible and adds a little “something” without overpowering the apples.
Mix-ins for a holiday vibe
- A handful of cranberries for tart pops
- Chopped pecans for crunch
- Raisins for a classic, old-school twist
- These will slightly change the moisture and texture, so keep the amounts modest.
Crust options
- All-lattice top: gorgeous and lets more moisture bake off
- Streusel topping (Dutch-style): sweet, crumbly, and extra cozy
- Cookie-crust experiment: fun, but it won’t behave like flaky pie dough, so expect a different structure
Serving and Pairing Suggestions
A homemade apple pie doesn’t need much, but it sure loves good company.
Classic serving ideas
- Warm slice with vanilla ice cream
- Slice with lightly sweetened whipped cream
Extra-fun toppings
- Caramel drizzle for a bakery feel
- A thin cheddar slice if you love that sweet-salty combo
- Cinnamon honey butter for a cozy twist
Drinks that pair beautifully
- Hot coffee
- Chai (apple + spice is a natural match)
- Hot apple cider
- Bourbon-spiked cider for holiday tables
Presentation tips
- A light sugar sprinkle gives you that subtle sparkle
- Lattice photos look great at a slight angle before slicing
- For a perfect slice shot, cut when fully cooled, then warm the slice gently so it looks set but tastes cozy
Storage and Reheating Tips
Store your apple pie recipe homemade covered at room temperature for up to 2 days, or refrigerate it in an airtight container for up to 4 days. For longer storage, wrap individual slices tightly and freeze for up to 3 months to maintain their flavor and texture. For additional information, check the official food safety recommendations from FoodSafety.gov.
That said, here are practical quality tips that usually help:
- Cover the pie well to prevent it from drying out and absorbing fridge odors.
- For a crisper crust, rewarm in the oven instead of the microwave when you have time.
- For speed, the microwave works, but the crust will soften.
If you’re baking for a holiday, making the pie a day ahead can be a win. Rewarm before serving so it feels fresh-baked, but still slices cleanly.
Conclusion
This is the best apple pie recipe homemade from scratch when you want a flaky, buttery crust and warmly spiced apples that actually set up into clean, happy slices. Keep an eye on the simple checkpoints: cold butter, chilled dough, a bubbling center, and that two-hour cooling window.
This is the kind of pie that makes people linger at the table, and that’s always been my favorite part of cooking. If you bake it this weekend (or for a holiday), save it to Pinterest for later and let me know how it turned out in your kitchen.
FAQs
What makes this apple pie recipe homemade special?
This apple pie recipe homemade is a true-from-scratch, classic double-crust pie featuring a buttery, flaky crust and warm, cinnamon-nutmeg spiced apples. It offers a comforting aroma and a perfect balance of tart and sweet flavors, making it a trusted choice for home bakers seeking that bakery-quality dessert.
What kind of apples should I use for the best apple pie recipe homemade filling?
A mix of Granny Smith and Honeycrisp apples works best. Granny Smith apples provide tartness and firmness to hold their shape, while Honeycrisp apples add sweetness, juiciness, and great flavor. This combination creates a layered, balanced filling that's not too sweet or mushy.
How do I achieve a flaky and tender pie crust?
Use cold butter cut into all-purpose flour with a bit of salt and sugar for flavor and browning. Keep the butter cold to create flaky layers as it melts during baking. Add just enough ice water to bring the dough together without melting the butter. Chilling the dough before rolling helps maintain its texture.
Can I prepare parts of the apple pie recipe homemade in advance?
Yes! You can make the pie dough up to 2 days ahead of time. Additionally, you can bake the pie a day early, which is especially helpful for holidays. The apple pie recipe homemade actually benefits from some resting time to let the filling set fully for clean slices.
What are some key tips to avoid runny apple pie recipe homemade filling?
To prevent runny filling, use flour as a thickener mixed with your sugar and spices. Also, watch for bubbling juices during baking — that’s a good cue the filling is cooking properly. Cooling the baked pie for at least 2 hours allows the filling to set up nicely for clean slicing.
What equipment do I need to make this classic double-crust apple pie recipe homemade?
You'll need a 9-inch pie dish, rolling pin, pastry cutter (or your fingers) to cut in butter, a baking sheet to catch drips in the oven, and foil or a pie shield to protect crust edges from over-browning during baking.
Apple Pie Recipe Homemade
Ingredients
Method
- In a large bowl, mix flour, salt, and sugar. Cut in cold butter until mixture looks like coarse crumbs.
- Slowly add ice water until dough comes together. Divide into 2 discs, wrap, and chill for 30 minutes.
- Toss sliced apples with sugar, flour, cinnamon, nutmeg, and lemon juice. Let sit for 10 minutes to allow juices to form.
- On a floured surface, roll one disc of dough into a 12-inch circle. Fit into your pie dish, leaving an overhang.
- Spoon the apple mixture into the crust, dot with butter pieces.
- Roll the second disc of dough. Cover the pie with it slits or cut into strips for a lattice top. Seal the edges.
- Brush the top with milk or egg wash and sprinkle lightly with sugar. Bake at 425°F for 20 minutes, then reduce to 375°F for an additional 35 minutes until golden brown and bubbly.
- Let the pie rest for at least 2 hours to allow the juices to thicken before slicing.